Knowledge Center & Industry News
Truck Accessories & Upfitting Blog
Expert buying guides, maintenance tips, and practical vehicle customization insights.
How to Choose Suspension Lift Kits for Your Vehicle?
Table of Contents
- Understanding Suspension Lift Kits and Their Main Components
- Assessing Your Vehicle’s Lift Requirements and Intended Use
- Comparing Lift Kit Types, Compatibility, and Suspension Geometry
- Selecting the Correct Lift Height, Tires, and Supporting Components
- Planning Installation, Alignment, Maintenance, and Safety Checks
- FAQS
- Conclusion
- Related Posts
Choosing Suspension Lift Kits is not simply a decision about adding height. It changes geometry, tire clearance, steering response, braking behavior, and daily comfort. SEMA’s 2023 Market Report valued the United States specialty-equipment automotive market at approximately $52 billion in 2022. That figure shows strong demand for vehicle personalization, but it does not prove that every lift kit suits every driver. Real-world fitment still matters more than appearance.
Automotive suspension engineer Steve Nadeau explains, “A lift is only successful when the entire suspension system works together.” His point deserves attention. A two-inch lift on a commuter vehicle may require different components from a four-inch system built for rocky trails. Buyers should check axle alignment, shock travel, brake-line length, driveline angles, and manufacturer load ratings. The Global Automotive Suspension Market report by Grand View Research also projects continued market growth, driven by vehicle customization and performance upgrades. Growth can encourage better products. It can also create confusing choices.
Look beneath the glossy photographs. Measure the tire-to-fender gap beside a level garage floor. Then consider how the vehicle actually travels: wet highways, gravel roads, steep ramps, or uneven trails. A higher stance may improve clearance, yet it can raise the center of gravity and reduce predictable handling. Some kits promise simple installation, but “simple” can become expensive after alignment, replacement wheels, and upgraded control arms. That is the uncomfortable part. The best Suspension Lift Kits are not always the tallest or cheapest. They are the systems that match the vehicle, workload, driving habits, and installer’s experience. Even this guideline has limits, because every chassis responds differently.
Understanding Suspension Lift Kits and Their Main Components
Choosing a suspension lift kit starts with understanding what changes underneath your vehicle.
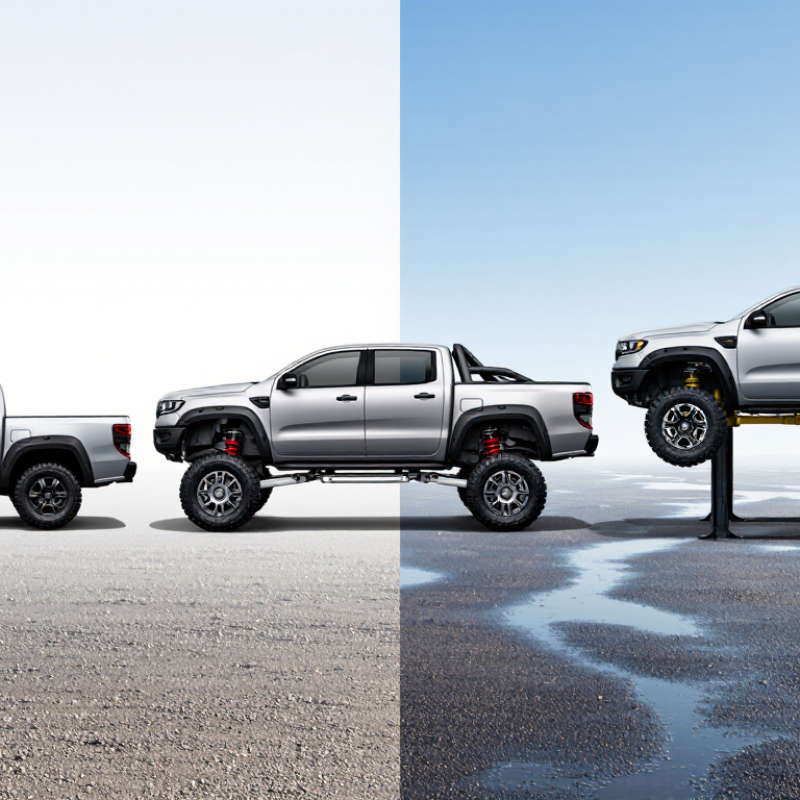
A complete system may include coil springs or spacers, shocks, control arms, a track bar, bump stops, and extended brake lines. Each part affects another. Raising the body without correcting axle position can create uneven tire clearance and poor steering feel.
I learned this during a trail setup. The vehicle looked higher, but the factory shocks reached their limit over sharp dips. That mistake was expensive. A lift should match tire size, payload, driving terrain, and suspension travel.
NHTSA’s Rollover Resistance Rating program uses track width and center-of-gravity height to assess rollover stability. More height can reduce stability, especially with heavy roof loads.
The agency’s Traffic Safety Facts 2022 recorded 42,514 traffic fatalities, reminding us that control matters more than appearance.
The aftermarket is large. The 2023 SEMA U.S. Automotive Specialty-Equipment Market Report valued the sector at about $52.3 billion in 2022. That figure reflects broad demand, not proof that every kit performs equally.
Check spring rates, shock travel, alignment requirements, and included hardware. Confirm whether new control arms or a steering correction component are necessary. Measure twice.
I still think many buyers focus too much on lift height. A modest, well-matched system often drives better than a taller, incomplete one.
Assessing Your Vehicle’s Lift Requirements and Intended Use
Choosing a suspension lift kit starts with your vehicle’s actual needs, not the tallest advertised height. Measure the current fender-to-hub distance on level ground. Then check tire clearance, suspension travel, and available ground clearance. A small lift may suit commuting and occasional gravel roads. Larger lifts can reduce stability and increase steering effort. Measure twice.
Your intended use should guide every component. Daily driving requires predictable handling, comfortable damping, and correct alignment. Trail use may demand more articulation, stronger shocks, and improved underbody clearance. Towing adds another concern because lifted suspension can change load behavior and braking balance. Check payload limits carefully. Keep it practical.
I once underestimated how quickly a modest lift affected driveline angles and headlight aim. That mistake mattered. After installation, inspect brake-line length, driveshaft angles, bump-stop contact, and steering clearance. A professional alignment should follow any suspension change. Verify wheel travel with the suspension fully compressed, not only at ride height. Local inspection rules may also apply. A reliable installer can compare measurements before and after fitting, identify unusual tire wear, and explain whether the setup matches your vehicle’s weight, terrain, and driving habits.
Comparing Lift Kit Types, Compatibility, and Suspension Geometry
Choosing a lift kit starts with the vehicle’s purpose, not the advertised height. A spacer lift keeps factory springs but reduces available compression travel. A body lift raises the cabin without changing suspension angles. Coilover systems offer adjustable height and damping, but demand careful setup. Long-arm kits improve control-arm angles on taller builds. They also require more installation space and alignment work. Keep the use case realistic.
Compatibility depends on axle type, drivetrain, wheel size, and existing wear. Check spring rates against payload, especially with a steel bumper or recovery equipment. Inspect ball joints, bushings, tie rods, and shock mounts before ordering.
A new kit cannot correct worn components. I once assumed a two-inch lift would fit without changes. The front brake hose became tight at full droop. That mistake changed my checklist. Use fitment data, then verify measurements on the actual vehicle.
Suspension geometry deserves more attention than visual height. Lifting can reduce caster, increase CV joint angles, and alter bump steer. Track-bar movement may shift the axle sideways. Leaf-spring vehicles can develop pinion-angle problems. After installation, measure ride height, alignment, and steering-center position. Cycle the suspension safely before road testing. A professional alignment report is useful evidence, not decoration. Small compromises remain.
Selecting the Correct Lift Height, Tires, and Supporting Components
A suspension lift should begin with your vehicle’s real use, not an impressive number. A small lift may suit commuting, light trails, and factory-like handling. A taller lift offers more clearance, but it can change steering angles, ride quality, and rollover behavior. Measure carefully. Record the current fender height, suspension travel, and tire clearance before choosing a kit.
Tire selection must match the chosen lift height and wheel specifications. Larger tires can contact the fenders, control arms, or inner liners during turns and compression. Check clearance with the steering fully locked. Check it again with the suspension compressed. Fitment matters. Tire weight also affects braking, acceleration, fuel use, and suspension response. I once underestimated this effect, and the vehicle felt noticeably slower after installation.
Supporting components deserve equal attention. A qualified technician should inspect brake-line length, shock travel, bump-stop position, driveshaft angles, and alignment requirements. Some vehicles may need stronger steering components or revised gearing after a major tire increase. Use parts with documented load ratings and installation instructions. Recheck fasteners after initial driving, then monitor unusual vibration, uneven tire wear, or pulling. A lift that looks correct in the driveway may behave differently on a rough road. Clearance is not enough.
Planning Installation, Alignment, Maintenance, and Safety Checks
Choosing a suspension lift kit starts with the vehicle’s actual use, not its advertised height. Measure tire clearance, axle travel, and the weight of added equipment. A two-inch lift may suit commuting, while a taller setup can change steering angles and braking behavior. Check the kit’s load rating and compatibility with your vehicle’s suspension design. Professional guidance matters here, especially when towing or carrying heavy tools.
Plan installation on level ground with proper jack stands, wheel chocks, and measured torque values. Never rely on a jack alone. Inspect brake hoses, bump stops, driveshaft angles, and wiring before tightening anything. After installation, drive slowly in a safe area and listen for clunks. I have seen rushed installations leave a brake line stretched at full suspension droop. That small oversight can become serious.
Alignment is not optional. Ask for caster, camber, and toe measurements, then keep the printed results. Uneven steering or shoulder wear often signals incorrect adjustment. Recheck fasteners after the first few hundred miles, because new components can settle. Inspect bushings, joints, shocks, and tire wear at every oil change. Rotate tires when appropriate, and watch for leaks or unusual vibration. My own early mistake was trusting a straight steering wheel instead of reading the alignment report. It looked fine. It was not. Safety checks should include headlights, parking clearance, emergency braking, and suspension travel before regular driving.
FAQS
Start with actual measurements, not the tallest advertised lift. Measure fender-to-hub distance on level ground. Check tire clearance, suspension travel, and ground clearance. Measure twice.
A modest lift often works better for commuting and occasional gravel roads. It usually preserves more predictable handling and comfort. Taller lifts may reduce stability and increase steering effort. Keep it practical.
Daily driving needs controlled damping, comfortable handling, and correct alignment. Trail driving may require stronger shocks and more suspension articulation. Towing requires careful attention to braking balance and payload limits. Heavy equipment changes the calculation.
Confirm axle type, drivetrain, wheel size, payload, and existing component wear. Inspect ball joints, bushings, tie rods, and shock mounts. Check spring rates against added equipment weight. A new kit cannot repair worn parts.
Spacer lifts retain factory springs but may reduce compression travel. Body lifts raise the cabin without changing suspension angles. Adjustable coilover systems can change height and damping. Long-arm systems improve angles on taller builds, but need more space.
Lifting can reduce caster and increase CV joint angles. It may also create bump steer or shift the axle sideways. Leaf-spring vehicles can develop pinion-angle problems. Small compromises remain.
Inspect brake-line length, driveshaft angles, wiring, bump stops, and steering clearance. Cycle the suspension fully before driving normally. Check compression and droop, not only parked ride height. Never rely on a jack alone.
Suspension changes can affect caster, camber, toe, and steering-center position. Request the measured alignment report and keep it for reference. Uneven shoulder wear may indicate incorrect adjustment. A straight steering wheel is not proof.
Conclusion
Choosing the right Suspension Lift Kits requires more than selecting a taller setup. First, understand the kit’s main components, such as springs, shocks, control arms, brackets, and hardware, and consider how they work together. Evaluate your vehicle’s intended use, including daily driving, towing, commuting, trail travel, or off-road conditions, because each purpose may require a different balance of comfort, clearance, strength, and handling.
Lift height should match your vehicle’s design, tire size, available wheel clearance, and suspension geometry. A moderate lift may preserve factory-like drivability, while a higher lift can require additional supporting components to maintain steering angles, alignment, braking performance, and stability. Before installation, confirm compatibility with the vehicle and inspect all included parts. Professional installation may be advisable, followed by a complete alignment and safety inspection. Regularly check fasteners, joints, shocks, tires, and suspension components after installation, especially following demanding use, to help maintain reliable performance and safe handling.

Blog Tags: